Creating an Account
Portfellow supports adding bank and brokerage accounts to your portfolio.
You can add a new account either during the initial Portfellow setup or later on the “Portfolio” and “Accounts” pages.
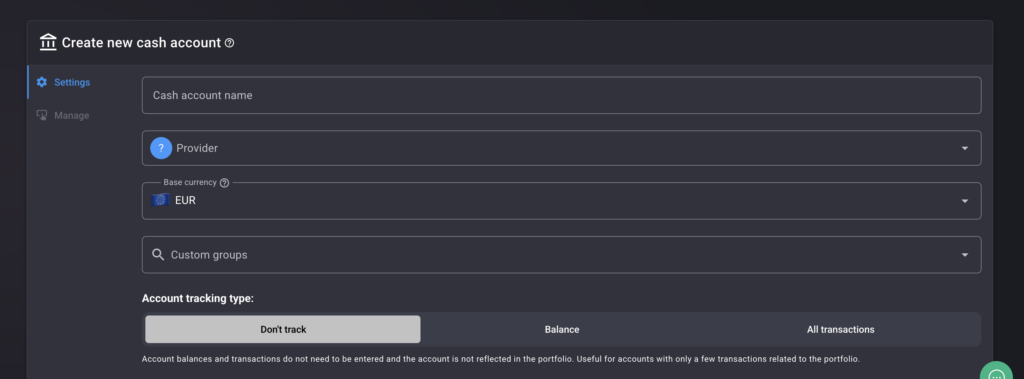
Click “Add New Account”, and an account creation window will appear.

When creating an account, you’ll be asked to specify the following details (examples included):
Account Name: Name – Bank/Broker – last 4 digits of the account (this naming helps distinguish accounts more easily in the future).
Service Provider: Select the provider from the list. If your provider is not listed, select “Other”.
Currency: Choose the base currency of this account (this account may hold other currencies, but they will be converted to the base currency for portfolio value calculations).
Account Representation Method: Portfellow offers three different ways to track an account: Do Not Track, Account Balance, or All Transactions. More details on these methods are covered in the sections below.
1. Account Representation Method – “Do Not Track”
This method is for investors who want to simplify portfolio tracking without worrying about account balance accuracy or tracking every single transaction.
Transactions related to this account do not need to be entered. If you import transactions, they will be stored in the background but will not affect the account balance or appear in the portfolio.
“Do Not Track” means the account will not be displayed in the portfolio and its balance won’t be included in the portfolio value calculation.

2. Account Representation Method – “Account Balance”
With this method, the account is displayed in the portfolio, and its balance is included in the portfolio value calculation.
Updating the balance is simple – it can either be:
- Imported from bank/broker reports
- Manually entered for a specific date
Individual transactions (deposits, withdrawals, interest, buy/sell transactions, etc.) are not required for balance calculations.
This option is ideal for investors who want to track account balances without recording every transaction.
Updating the Account Balance
To update the balance, go to the desired account page and click “Update”.
You can then enter the balance for a specific date.
After saving, the updated balance will be reflected under “Balance History”.
3. Account Representation Method – “All Transactions”
With this method, the account is displayed in the portfolio, and all individual transactions are used to calculate the portfolio value.
This method takes into account all financial movements on the account, such as:
- Deposits and withdrawals
- Purchases and sales
- Dividends and interest payments
- Fees and expenses
For accurate performance tracking, every transaction must be entered exactly as recorded in your bank or brokerage account.
Essentially, this method duplicates the full transaction history in Portfellow for precise return calculations.
3.1 Updating the Account Balance
There are three ways to enter transactions:
- Automatic integration
- CSV file import
- Manual entry
Before entering transactions, it’s best to set an initial balance for the account.
Read more about setting initial balances in the article “How to Get Started with Portfellow?”
Before entering transactions, it’s best to set an initial balance for the account.
Read more about setting initial balances in the article “How to Get Started with Portfellow?”
3.1.1 Setting Up Automatic Integration
The most convenient way to track account movements is through automatic integration.
Portfellow integrates with major regional banks and selected brokers, and the list is continuously expanding.
To set up an integration:
- Go to the account page.
- Click “Add Integration”.
- Follow the on-screen instructions to connect your bank or brokerage account.
Automatic integrations retrieve transactions from the past 90 days.
If you need a longer history, you will need to either import older data (see section 3.1.2) or manually enter transactions (see section 3.1.3).
3.1.2 Importing Transactions via CSV File
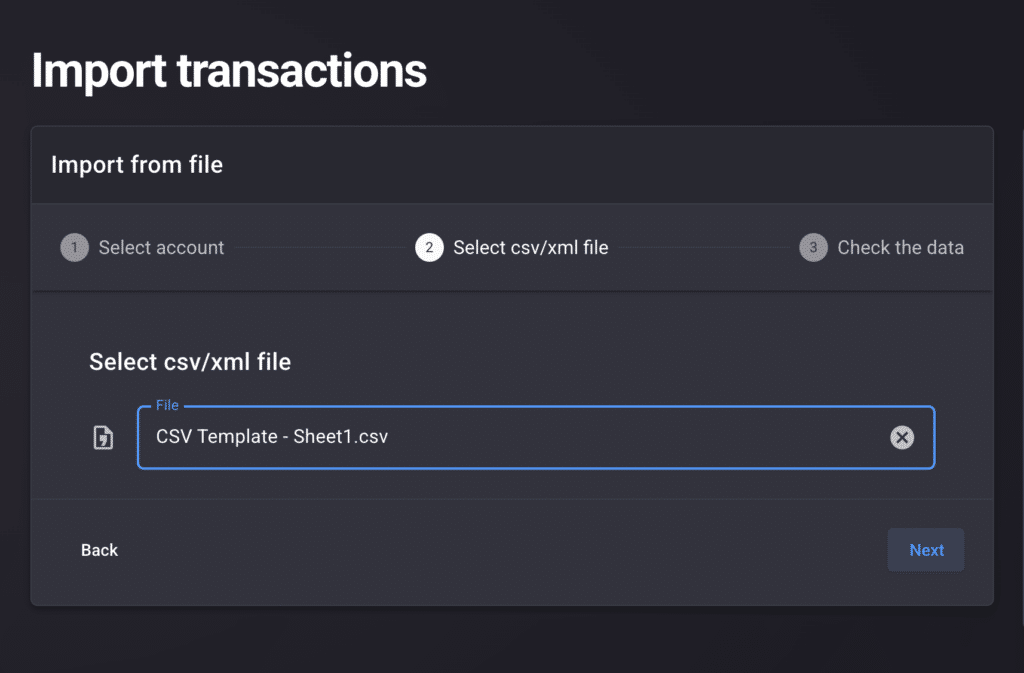
The next best option after automatic integration is importing a CSV file from your bank or broker.
To import:
- Download a CSV file from your bank or brokerage account.
- Upload it in the transaction import module.
- In the final step of the import process, transactions will be displayed for review.
At this stage, transactions can be classified as:
- Investments (e.g., buy, sell, dividends, investment interest)
- Account movements (e.g., deposits/withdrawals, account interest, fees)
Note! If classified as investments, a new instrument will be created in the portfolio, or the transaction will be added to an existing instrument.

3.1.3 Manual Entry of Transactions
Transactions can also be entered manually.
To manually add a transaction:
Once added, the transaction will appear in the Transactions module list.
Go to the detailed account page.
In the Transactions module, click “Add New Transaction”.
A window will open where you can manually enter the transaction details.
What’s Next After Setting Up Accounts?
Once you have created accounts and chosen how to track them, you only need to update balances or confirm transactions at regular intervals.
Investors who selected “All Transactions” should regularly confirm and update transaction data.
Investors who selected “Do Not Track” don’t need to manage accounts manually at all.
Investors who selected “Account Balance” only need to update balances periodically.
Happy portfolio tracking and smart investing! 🚀