The easiest way to enter account transactions is by using automatic integration. Portfellow automatically integrates with major banks in the region as well as selected brokers. The list of supported institutions is constantly expanding.
With automatic integration, your transaction data is automatically transferred to the Portfellow app. Your only task is to categorize and confirm the transactions. More details on this can be found in the section “Step 4: Review Transactions and Cash Movements” at the bottom of this article.
The next most convenient method for entering transactions is importing a CSV/XML file. Here’s how you can do it:
Importing Transactions from a CSV/XML File
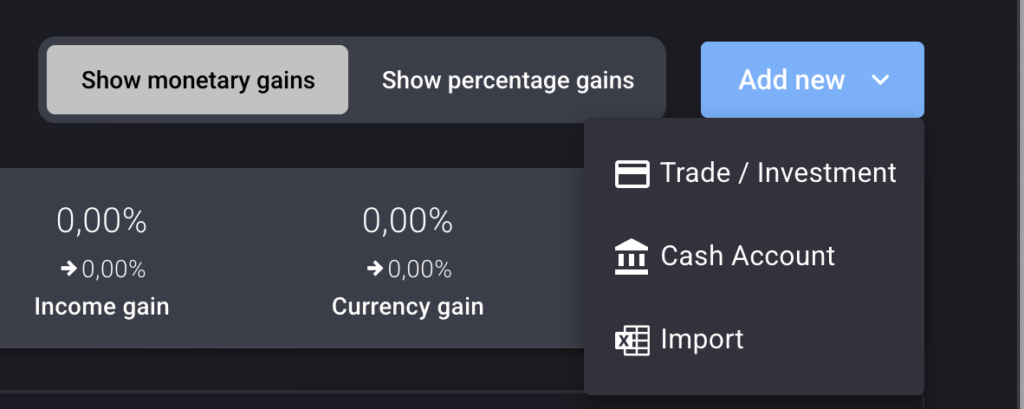
To import transactions, download a CSV file from your bank or broker and upload it into the Portfellow import module. You can find this either on the Portfolio page or in the Transactions section of a specific account by clicking “Add New”.

For well-known banks and brokers, the system automatically recognizes CSV file formats. For less common service providers, you can manually assign the correct fields.
If your transactions are stored in Excel or Google Sheets, or if you prefer to create your own file, you can use the Portfellow sample Google Sheets file. If your file follows the same column structure and logic, Portfellow should recognize all transactions correctly.
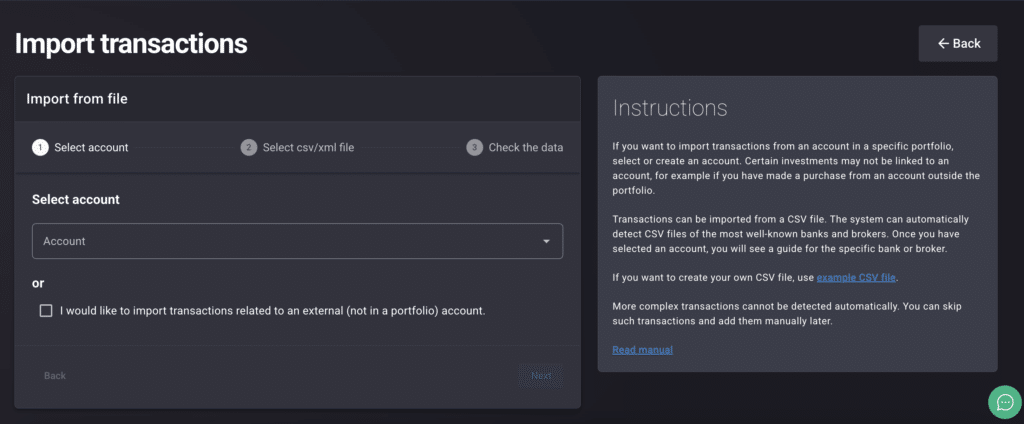
Step 1: Select an Account
The first step in importing transactions is choosing an account.
If you want to import transactions not linked to any specific account, check the box “I want to import transactions not linked to a specific account”. This is useful if the imported transactions were made from an external account outside your portfolio.
If you want to import transactions for a specific account, select an existing account or create a new one.
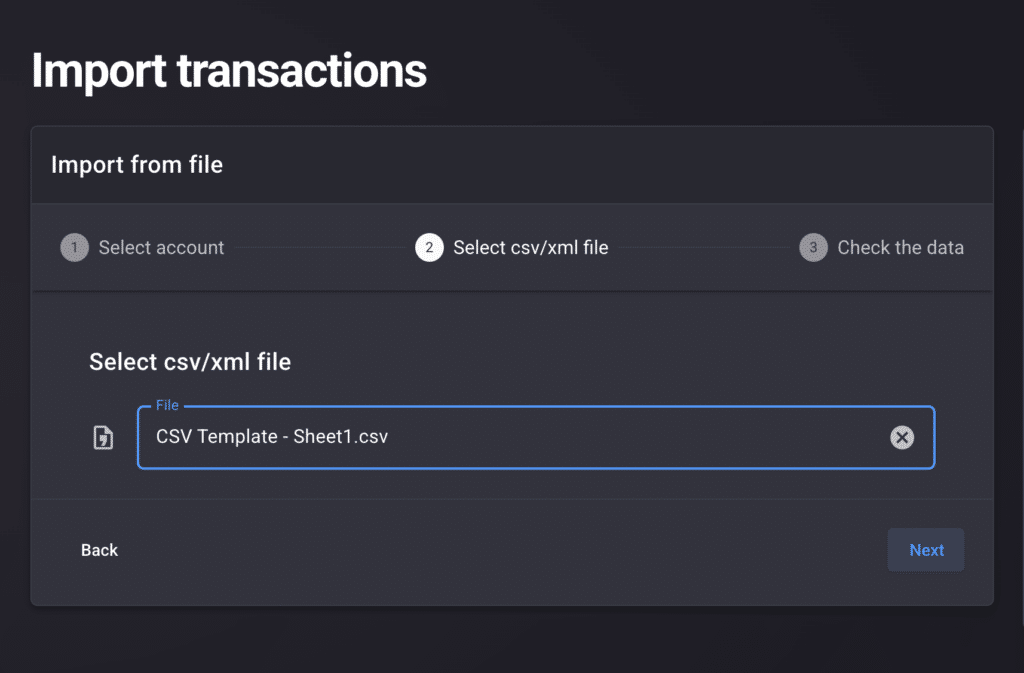
Step 2: Upload CSV/XML File
The second step is to upload the CSV/XML file. Click on the CSV file field and select the file from your computer.

Step 3: Review Data
The third step is data verification.
- If the file comes from a financial institution that Portfellow does not automatically recognize, you will need to manually map the fields.
- Portfellow will guide you through the required fields needed to correctly import transactions.
- Categorize as many matches as possible, then click “Next”.
Even if not all required fields are categorized, transactions can still be imported.

Step 4: Review Transactions and Cash Movements
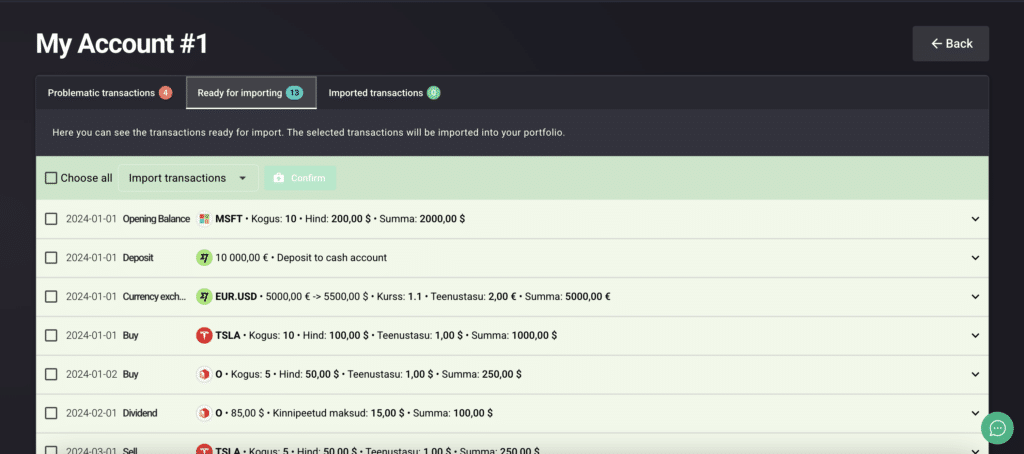
In the final step of the import process, the module will display all imported cash movements.
Transactions will be categorized as:
- Investments (e.g., buy, sell, dividends, investment interest)
- Account movements (e.g., deposits/withdrawals, account interest, service fees)
Most transactions will be automatically recognized by Portfellow and listed under the “Ready for Import” tab.
Occasionally, there may be transactions that Portfellow does not recognize, which will be displayed under the “Problematic Transactions” tab.
For problematic transactions, you can manually assign the correct category and then mark them as resolved. Once corrected, these transactions will be moved to the “Ready for Import” tab.
Important Notes
- Before finalizing the import, ensure that all transactions are correctly categorized.
- To confirm transactions, check the appropriate rows and click “Confirm”.
- If a transaction is categorized as an investment, Portfellow will either create a new instrument in the portfolio or add a new transaction to an existing instrument.

Successfully Imported Your Transactions?
Now that you’ve successfully imported your data, you can repeat this process for all your other accounts.
Happy portfolio tracking and smart investing! 🚀